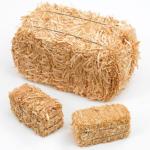
Hay Bale Garden
-
Have you ever seen a garden made from hay or straw bales?

Using hay or straw bales is a great way to have a raised garden bed without the cost or hassle of building frames and filling with soil and amendments. You don’t have to dig or amend the soil, and weeds are not a problem. It is inexpensive, simple to do, and best of all, at the end of a season or two, the remains of the hay or straw bale and what was planted become compost to use in building a new one. If it turns out you don’t like the location of your hay bale bed, it is easy to plant the next one in a better, maybe sunnier location. Plants love it. The main concern will be keeping it moist as the hay or straw bale bed tends to dry out more quickly than if plants are directly in the ground.Our example below uses 5 hay or straw bales, but you can use fewer or more depending on the available space. Arrange the bales in a convenient configuration, depending on the number of bales that you use.
What You Need
-5 bales of hay or straw (straw bales are usually cheaper than hay bales)
-A soaker hose (or a drip system)
-Landscape cloth for underneath if gophers or other burrowing animals are a problem
-Consider fencing the perimeter of the bed if rabbits are a problem Potting soil (one bag per bale)
-Compost (one bag per bale)
-Fertilizer
-Transplants of whatever you like to eat and want to grow. Seeds do not work as well as transplants, so if you want to start with seeds, grow them to transplant size firstBuilding the Bed and Readying It for Planting
-Arrange 4 of the bales in a square, leaving the center open It’s recommended that the bales sit so that the twine (made of plastic or metal) is on the top and bottom of the bale and the hay or straw lies horizontally. This way the water will soak through the bale rather than running quickly through to the ground underneath
-Break open the 5th bale and put the loose hay or straw in the open center, but make sure that it is packed in so it will hold the transplants. This is where you will place root plants such as potatoes, carrots, beets, or onions
-Spread a layer of potting soil on top of all of the bales, to a thickness of 2-3 inches
-Spread some fertilizer on top of the soil, at the rate recommended on the package
-Spread a layer of compost on top of all, to a thickness of 2-3 inches
-Water thoroughly, and continue watering for 5-10 days, giving enough time for the compost and straw to “cook.” Then let sit for 1-2 weeks to cool off. Warm is okay, but you don’t want to “cook” the roots of the plantsWhen and How to Plant
-Choose what you want to plant, based on the season, what you will eat and how much of a harvest you expect to get. Anything that grows in the ground or in a raised bed will grow in the hay/straw bale
-Plan to support any plant that would need support if grown in the ground, for example, tomatoes or peas
-Consider letting some plants that like to “ramble” grow over and down the sides of the bales, for example, cucumbers, squash or melons
-Plants that grow taller should be planted on the north side of the bed, while shorter growing plants, such as herbs, should be placed on the south side, in front
-Consider an organized plan for your plantings, including flowering ornamentals, especially along the sides of the bales
-Grow beets, carrots, onions, and potatoes in the middle section
-Consider the following capacity per bale (you have 4 bales to plant)
Up to 6 cucumber plants, trailing over the edge, or…
3 squash, zucchini or melon plants, again trailing, or…
4 pepper plants, or…
12 - 15 bush bean or pea plants, or…
2-3 tomato plants
-You have 4 bales plus the center part to work with, so consider the combinations based on what you like to eat and how much you want These are just rough ideas about how many plants per bale, but you can plant other things as well, like herbs. Consider the mature size of each plant compared to the guidelines above when planting
-Other plants that grow well in a hay bale include lettuces of all kinds, cabbages, broccoli, spinach, chard, bok choy, kale. Avoid invasive herbs like mintsMaintenance
-Water frequently, depending on the weather, but probably daily. The risk of the bales drying out is a concern. They do dry out more quickly than anything planted in the ground or in a traditional raised bed
-You can put a soaker hose on a timer so you don’t need to worry about watering
-Feed your plants using a balanced fertilizer intended for vegetables. Follow the guide on the package for amount and frequency of feeding
-You can add compost and soil if the bed sinks too much and you want to keep it going. You can even add new plants without totally starting over
-When the plants are finished growing and producing, simply let the entire bed become compost; or break it up and add it to your compost pile

