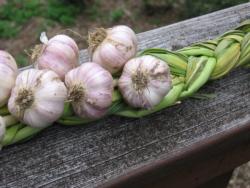
Garlic, growing
-
If life isn't worth living without the richness of garlic, fall to early winter is your time of year -- it's garlic planting time! But do so soon, certainly by mid-December!

Planted during fall's cool weather, the cloves will develop strong root systems before they "shutdown" for the winter. Garlic is very hardy, and not damaged by frosts or even light freezing.Choose the largest cloves you can find, even if it means purchasing half-a-dozen heads to get only a dozen big-size cloves. Start bigger, you end up bigger.
If you kind of like garlic, but not its bite or tiny size, elephant garlic is for you. It's not really garlic, though, but is related -- Allium scorodoprasum instead of A. sativum. Single cloves can measure two inches long and an inch across, and its flavor is mild, with really only a hint of garlicness. It can stand even colder temperatures than regular garlic.
With the first spring warmth, leaf production begins. This above-ground growth will be a constant surge through late May or June. "Heading up" or bulbing will occur in June or July each summer -- it's determined by daylength -- regardless of when the cloves were planted. The larger the plant and the more leaves it has when this critical time is reached in the spring, the larger the new bulb will be. The more nutrition in the soil and the more days to grow, the bigger the head.So, planting in the fall or early winter in rich soil will produce the largest cloves when the head matures. Planting in the spring, even with rich soil, will produce only medium- or small-sized cloves, or a single bulb without cloves. These immature bulbs can be used in place of a single large clove in recipes, or they can be left in the soil or stored and replanted the following fall, when they'll grow further and then mature into separate cloves.
Prepare soil well for growing garlic. It needs better growing conditions than other alliums. Make a growing-only, no-stepping-allowed raised bed that's well-drained. Dig in lots of compost, manure, and a balanced fertilizer with approximately the same numbers for nitrogen, potassium, and phosphorus (the N-P-K numbers on the package). Mix thoroughly to get rid of clumps.
Plant cloves four to six inches apart and one to two inches deep. The flat basal scar goes down, and the point goes up. Water the bed well, and keep the the soil moist through next May.

